MIDI effects are an often overlooked and underutilized set of devices that are included in every version of Ableton Live 9 (Suite, Standard, and Intro). These simple digital devices can help you break through creative roadblocks, uncover new melodies or chord progressions, and breath new variation and expressivity into dead tracks.
MIDI effects are designed to process, effect, alter, or mangle the MIDI data traveling through a DAW (Digital Audio Workstation) before it arrives at the instruments that will interpret that MIDI data into audio. Ableton Live’s included suite of MIDI effects cover a wide range of ways you might want to process your MIDI, like arpeggiating a held chord or restricting all of the possible notes you might play to be within a specific musical scale.
If Live’s included MIDI effects aren’t adventurous enough for your creative whims, there is an ever-growing library of Max for Live MIDI effects that do some pretty incredible things. Today, though, we’re going to keep things relatively simple and look at how powerful and useful several of Live’s included MIDI effects can be in your creative workflow.
Device Overviews
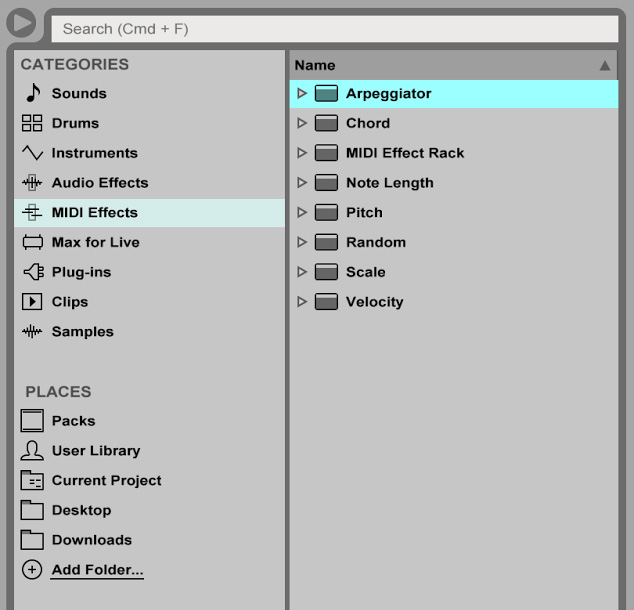
Let’s start by taking a quick look at some of Ableton’s included MIDI effects. If you’re not already somewhat familiar with the following devices, I would recommend that you spend a few minutes experimenting with each of these devices before reading on.
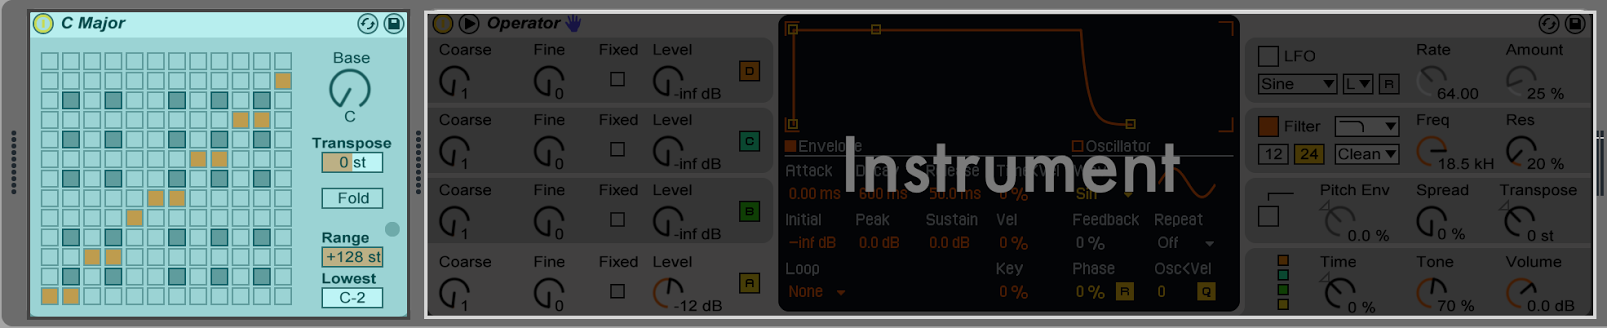
Scale

The key to wrangling the craziest of the MIDI effect chains into cohesive melodies and harmonies is the Scale MIDI effect. This device allows you to filter and transpose incoming notes into specific note collections.
The Scale’s interface is focused around a 12x13 grid that represents the incoming notes on the x-axis and the transposed, deactivated, or unaffected outgoing notes (as edited and shown by the orange squares) on the y-axis. Along the righthand side of the interface are several other controls for further tailoring the device’s behavior.
Chord
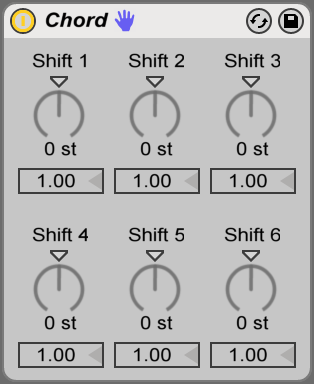
The Chord MIDI effect can build chords based upon any received MIDI note by adding up to six additional notes or what the Chord device calls “shifts.” These six shifts can be anywhere from one to 36 semitones above or below the received note and have their own relative velocity.
The Chord’s user interface shows very simply the six knobs and the six number boxes that are used to set the relative transpositions and velocities of the six potential shifts.
Arpeggiator
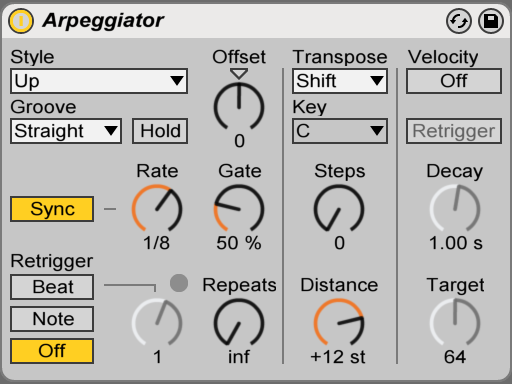
Live’s Arpeggiator MIDI effect can be used to rhythmically break apart the playback of a chord in variety of patterns, rhythms, and gestures.
The devices interface is neatly divided into three sections: the leftmost section controls the pattern and rhythm of the arpeggio, the center section controls the transposition of the arpeggiated pattern, and the rightmost section determines how the velocity of the arpeggio evolves over time.
Pitch
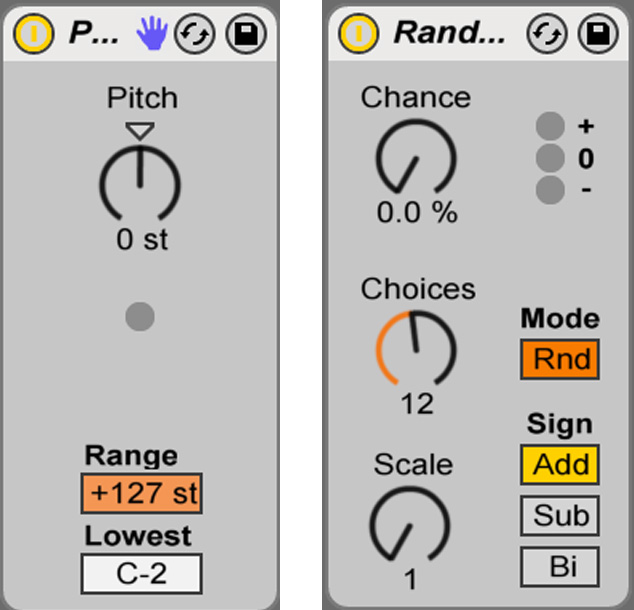
This is a very simple MIDI effect that can transpose all of the notes it receives +/- 128 semitones.
Random
The Random MIDI effect can randomize the notes it receives up or down by an adjustable range.
The three dials on the left set the probability that a random note will be generated and the range of the random notes it can choose from. The boxes on the right side of the device sets the output mode and if the randomized note will be above or below the received note.
Velocity
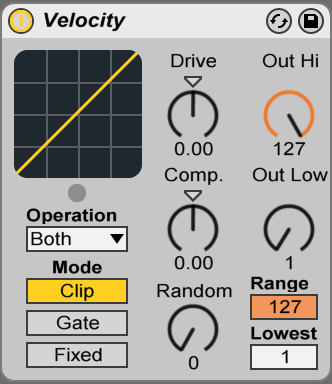
The Velocity MIDI effect is great for adding to or controlling the dynamic expressivity of any musical idea and can be particularly useful for generating variation in percussion or drum patterns. In many ways, the Velocity device manipulates MIDI data in the same ways that an audio compressor and/or gate does, but with the unique capability of being able to randomize the velocity of each note it receives.
Most of the controls of the Velocity device can be understood by looking at the visual graph in the top left corner. In this article, however, I will only be using its “Random” dial to randomize the velocity of our Hi-Hat pattern.
Hint: Keeping Ableton Live’s Info View open while working with new devices can be really handy for understanding what each of the parameters of a new device do. To open the Info View, either click the disclosure triangle in the bottom left corner of Live’s window, or use the keyboard shortcut “?” Now, any time you hover your cursor over something, the Info View will provide you with a brief description of it.
Molding Cohesive Melodies and Harmonies
The secret to creating melodies and harmonies that work well together is to restrict all the notes that make up a progression to a specific scale or collection of notes just before passing them along to the instrument that will respond to those notes.
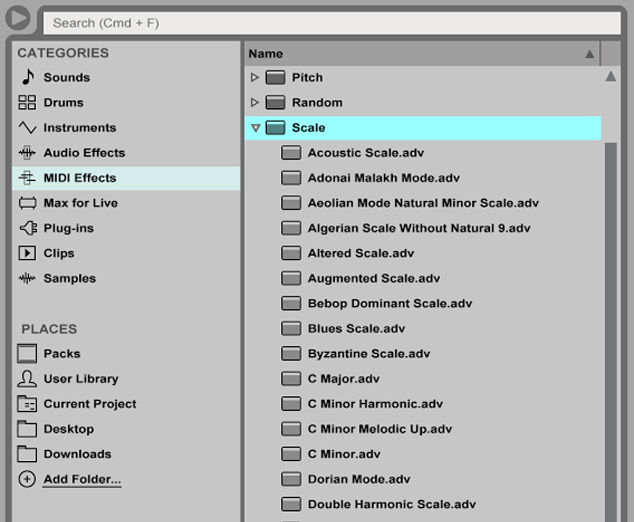
If you already have some musical clips going but they just don’t seem to be gelling, try experimenting with adding a Scale MIDI effect just before (to the left) each of your melodic/harmonic instruments and adjusting each of those Scale devices to the same settings.
Not comfortable just yet using the Scale MIDI effect to create your own custom scales? That’s okay, just start by digging through the Scale’s included presets and remember: the secret is to have the Scale effect as the last MIDI Effect before each of your instruments and that all the of the melodic and harmonic tracks have a Scale MIDI effect with the same exact settings.
Note: One of the incredibly powerful things about using MIDI Effects to create your musical ideas is that at any time you can swap them out for a different preset or a different device and subtly — or dramatically — alter your project.
Finding New Harmonic Progressions
Perhaps, like me, you find yourself continually using the same few chords and stumbling into the same old progression time and time again. Combining the Chord and Scale MIDI effects can be a great way to break from what you know and discover new harmonic territories.
Before you begin sketching out ideas, try adding a Chord MIDI effect followed by a Scale MIDI effect to an instrument track. If you really want to push yourself outside your comfort zone, try loading an unfamiliar preset for your Scale MIDI effect. Then start fiddling with the Chord MIDI effect’s settings.

The Chord device will build a chord on any and all of the notes it receives, so I find I get more musical results if I only add a few shifts with the Chord MIDI effect and then experiment with triggering the Chord device with two or more notes that may not always move in parallel or rhythmic unison.
Note: Depending on the materials you are working with, the Chord MIDI effect can start creating a lot of notes, so you’ll want to check the instrument you are working with to see how many notes or voices it can produces to be sure you are actually hearing all the notes that it is receiving.
Creating a Melody to Match Chord Progressions
Generating melodies that follow your new chord progressions is quick and easy with MIDI effects. To begin, copy and paste the clips that contain your chord progression and your Chord and Scale MIDI effect over to your melodic instrument track.
Next, insert an Arpeggiator MIDI effect in between the Chord and Scale MIDI effects, and set its Style to one of the random options (e.g. Random, Random Other, Random Once). Then try playing around with the rest of the Arpeggiator settings until you find something inspiring.

You can easily transpose the resulting melodies up or down by adding the Pitch MIDI effect after the Arpeggiator.

If your melody still needs a little something, try adding the Random MIDI effect after the Pitch MIDI effect.

I don’t like to let things get too chaotic, so I find that setting the Random MIDI effect’s Chance to around 40%, Choices to two, and its Sign to “Bi” usually gives me some pretty good results.
Generating Rhythmic Patterns
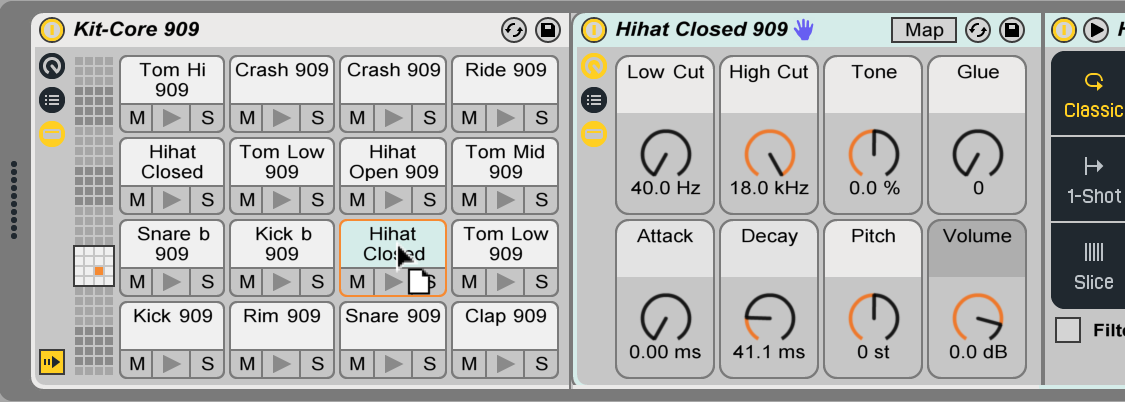
MIDI effects can also be great for generating complex rhythmic patterns and injecting some variety into static clips. Try grabbing your favorite drum kit and creating a clip that contains a long, held note for your hihat.
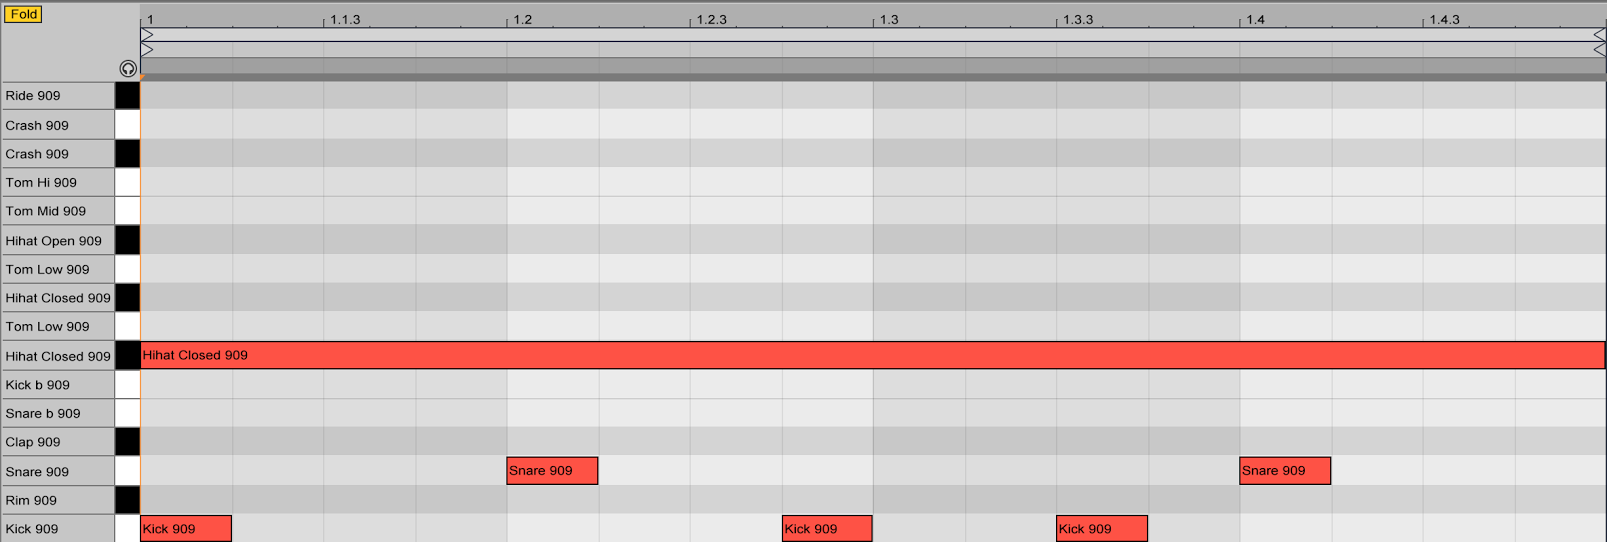
Then drop an Arpeggiator MIDI effect, followed by a Velocity MIDI effect, directly onto the pad that triggers the hihat sound.

Next, try drawing an envelope/automation for the Arpeggiator’s Rate and experimenting with the Velocity MIDI effect’s Random dial.

Hint: Setting your clip’s grid to ¼ or ⅛ notes can make automating the Arpeggiator’s rate easier.
Capturing the Results
Randomness is a great way to generate lots of new ideas, but often, you’ll want to capture some of those ideas either for further editing or just to start putting a song together.
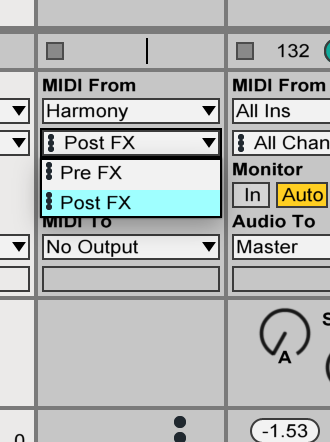
In Live, it’s really easy to record MIDI from one track onto another track. Start by adding an empty MIDI track to your project. Then set its input source to be the track that you want to capture MIDI data from and use the lower input menu to specify that you want to record the incoming MIDI “Post FX” so that you’re recording the MIDI coming from that track after it has been affected by all the MIDI effects.
Then, record enable the new MIDI track and click a record button in an empty clip slot to begin capturing the MIDI data.
Once you have captured the desired materials, you can now edit the clip to the length you want, rename it, move it to the track I recorded it from, and finally, turn off all the MIDI effects on that track. You can either continue to edit this new clip to create new variations, capture some new materials, or see what happens if you start adding more MIDI effects to further process your collection of new ideas.