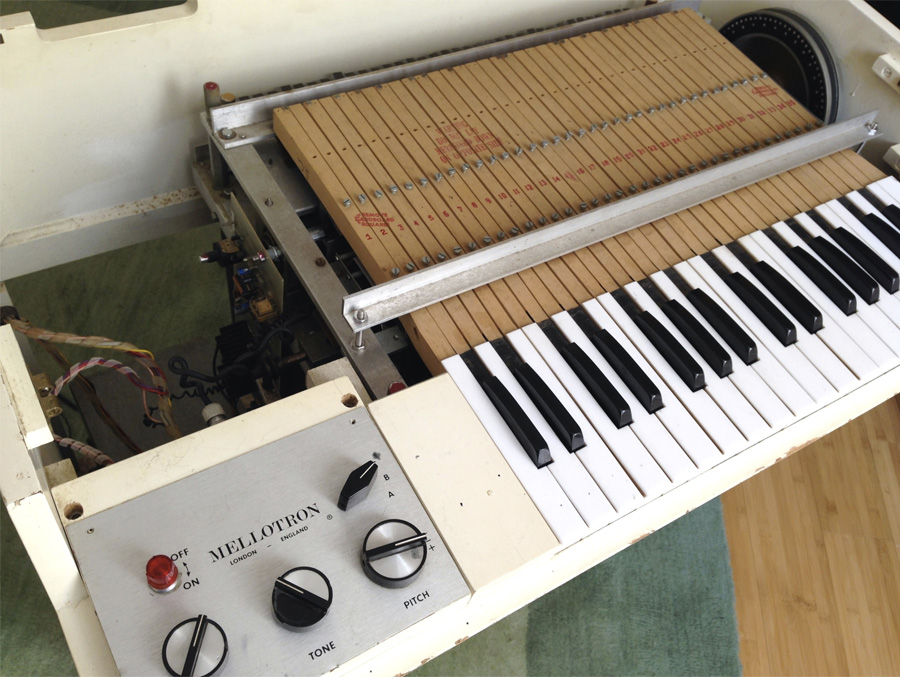
The famous Mellotron M400, manufactured by Streetly Electronics in Britain between 1970 and 1977 (and continued as the Novatron 400 for a few more years), is a truly unique keyboard instrument. As fans of Mellotrons know well, every key plays back a recording of that note from a long strip of actual magnetic tape.
The distinctive taped sounds, ranging from flutes and violins to human voice choirs and assorted “sound effects” were featured on many albums recorded in major studios throughout the ‘70s.
Earlier versions of the Mellotron were famously heard on The Beatles’ “Strawberry Fields Forever” and the late-’60s albums of The Moody Blues, but the M400 was the best-selling iteration. At 122 pounds, it was still cumbersome, and its tape-replaying mechanisms could be unreliable, but the M400 was a pared-down improvement on the 300- to 400-pound Mark II.
So what does it take to restore a more than 40-year-old Mellotron back to full working order? I’ll take you step-by-step through the whole process that a recent “patient” at our workshop went through. As time-consuming as this job was, it actually could have been a lot worse, as, fortunately, no major parts of this instrument had suffered damage beyond just the ordinary wear-and-tear of time.
When Mellotron M400 #1344 arrived at Bell Tone Synth Works, the power connector was broken and it hadn’t been turned on for decades. Unsurprisingly, after fixing the connector and powering it up, it barely worked at all.
The motor shrieked, there was a loud rumble and 60Hz hum in the output, the preamp controls didn’t work, only about one third of the keys produced sound, and every note would randomly modulate, flutter, and scrape like the sound of a cassette player eating a tape.
I quickly turned it off, as continuing to let a Mellotron run in a state like this has the potential to do additional damage.
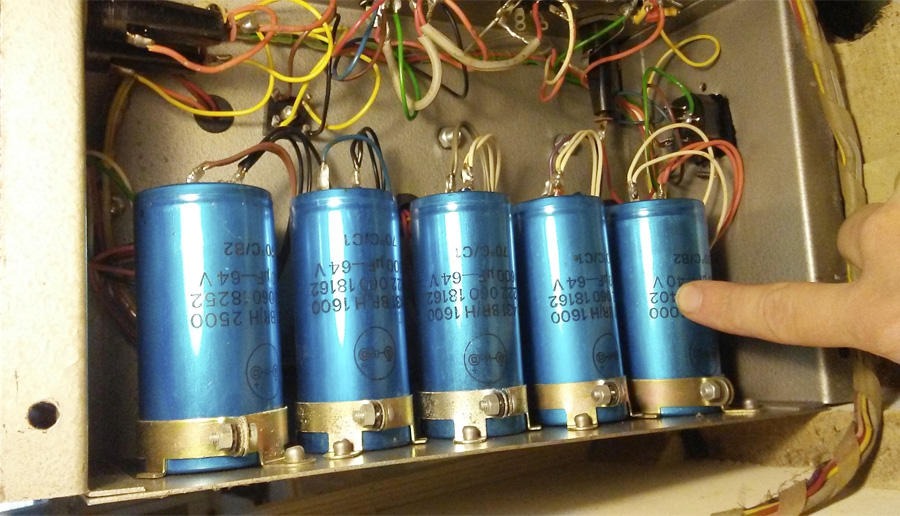
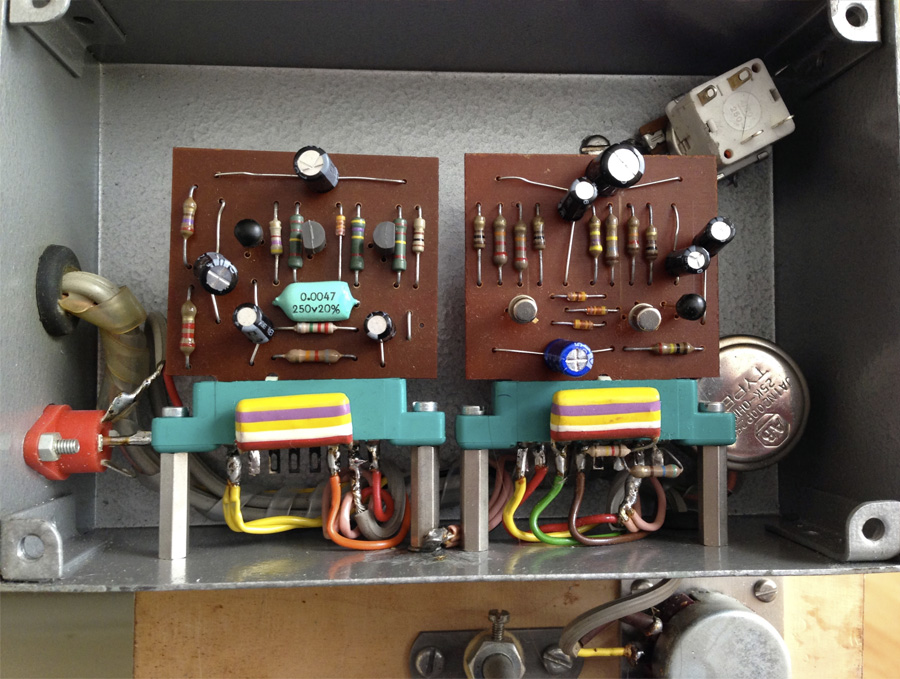
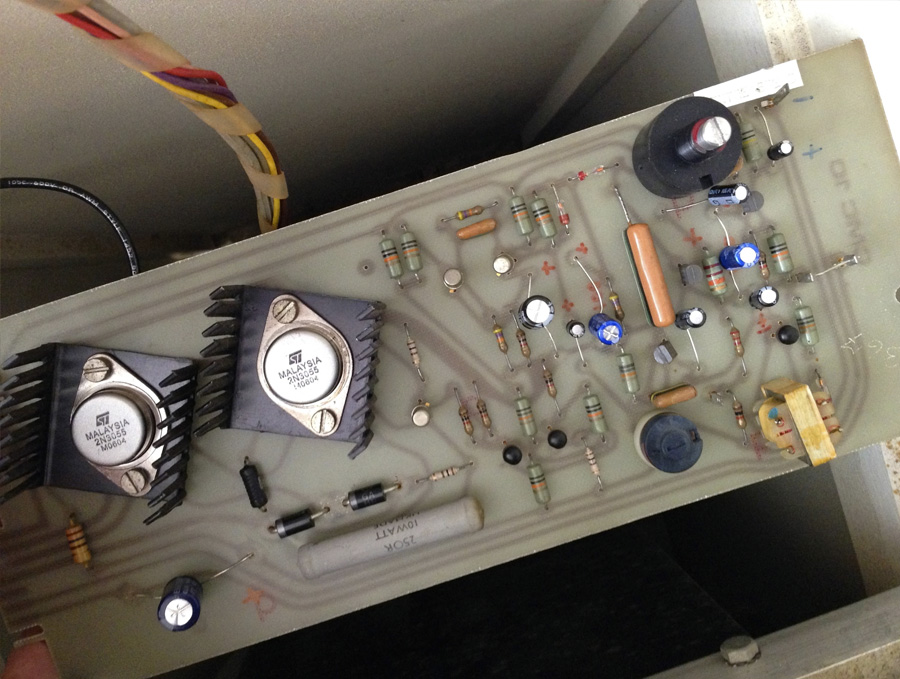
The first step was to completely overhaul the electronics of the instrument: power supply, preamp and filter circuit, and motor control (CMC-10) board.
Many people opt to entirely replace the motor control circuit board with one of an entirely new design now available via Mellotron.com. These new boards are definitely better than the original, both lessening noise on the output and allowing the player to play more notes at the same time before the motor starts to slow down, which causes the pitch to drop. However, my client on this occasion asked that I keep the original board in and just make it sound as good as I could.
This entailed replacing all electrolytic capacitors throughout the whole instrument, some broken potentiometers on the control panel, the power transistors on the CMC board, and reflowing the solder on all terminal connections throughout.
As I examined the wiring in detail, I was amazed to discover several places where ground loops had literally been built into the design of the instrument. I did some rewiring to correct these. To my relief, when I powered it up after this, the loud hum was gone and the remaining motor noise was substantially lessened.
The next step was to tackle the mechanical aspects of the instrument. In order for a Mellotron to work correctly, a lot of elements must quite literally line up perfectly.
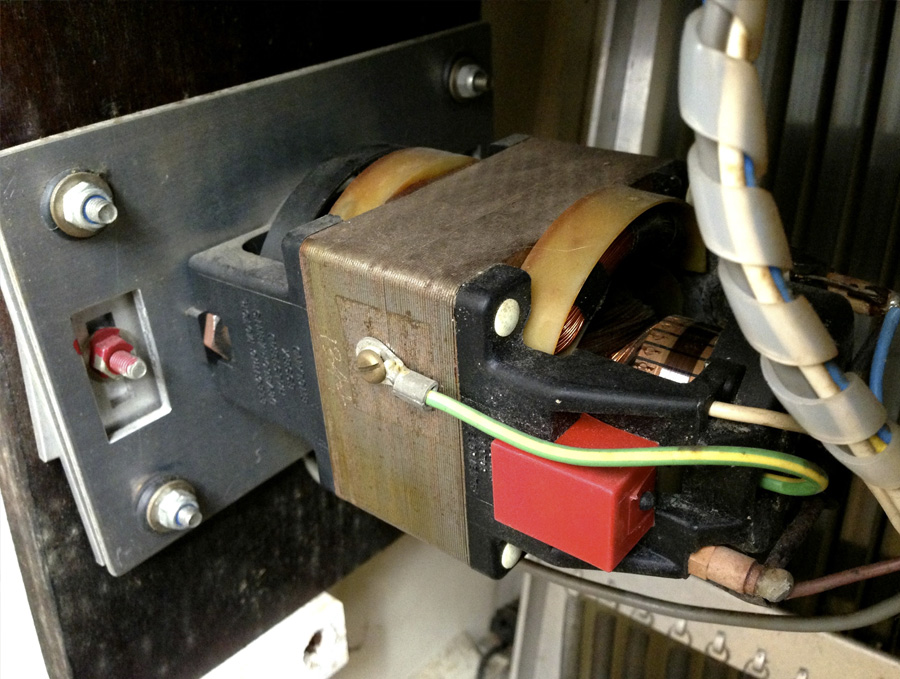
There is a common misconception that Mellotrons use tape loops, but they actually use linear strips of tape. The constantly-running motor turns a 1.5” diameter metal rod called the capstan, which runs horizontally under the rear of the keys. Each of the 35 keys on the keyboard has its own approximately five-foot-long strip of tape. The strips of tape hover above the capstan and are positioned over their own play heads, which rest on a horizontal shelf closer to the front of the keys.
When you press a key, two things happen. A free-rolling rubber wheel connected to the back part of the key—called the “pinch roller”—pins the tape against the capstan and begins to roll as well, causing the tape to advance towards the back of the instrument. At the same time, the “presser pad,” mounted on a metal tab also connected to the key, presses the moving tape down against the play head, allowing the tape to be heard.
Your note will simply run out of tape after about seven to eight seconds, when the sound will stop. When you release the key, a spring at the front of the instrument pulls the tape back down to its resting position.
I started out by just cleaning out as much dust as possible and lubricating the moving parts. The magnetic head under the motor—called the “tach head”—had to be cleaned with head cleaner and demagnetized with a head demagnetizer tool.
Then, I removed the entire key frame and removed each key from the frame. The pinch roller wheel of each key was soaked in a cleaning and lubricating solution, then put back on its key and carefully aligned so that it would spin freely and in a direction perfectly parallel to the line of the key. I cleaned each of the 35 play heads with head cleaner and demagnetized them all.

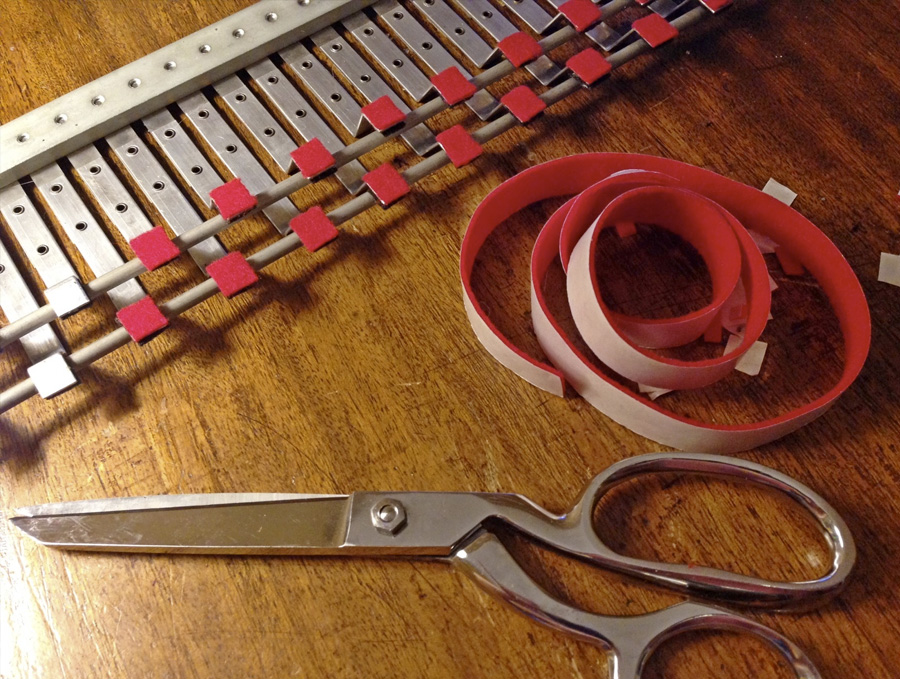
Perhaps the trickiest part of this process is replacing and aligning the presser pads. The presser pad assembly is two rows of metal tabs that are mounted by brackets at either end of horizontal rods under the keys. Each tab has a soft pad on it, which is what makes contact with the tape and presses it against the play head.
Many of these were missing, which was why so few notes on the keyboard had been producing sound. I replaced these with piano felt, being sure to line up the nap of the felt with the direction the tape would be moving in to reduce friction as much as possible.
The alignment of the presser pad tabs is part of a delicate and tedious dance between four adjustments that often must be performed several times for every individual key. Each presser pad tab must be bent into the correct shape and angled correctly.
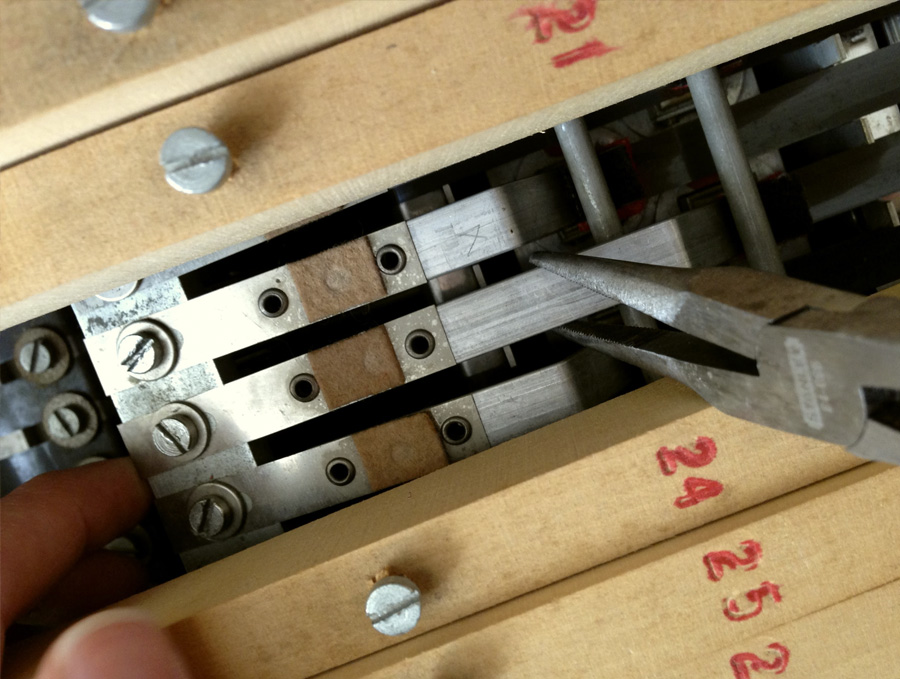
As each key is put back in place, the tension of each key must be set so that the key has the correct height and travel. The pressure pad screw on each key must be driven in the correct amount to set the presser pad tab at the correct height above the play head. Finally, each pinch roller screw must be set to the correct height so that the pinch roller exerts just enough pressure against the capstan to make the tape roll without slowing it down.
If the keys were all put back in, with all of the adjustments complete, and a certain note’s tape was still getting garbled no matter what I tried, I would have to remove the key, adjust its presser pad tab and then do all the other adjustments over again. Sometimes, adjusting one presser pad tab will inadvertently upset others, as they are all part of the same comb-like assembly.
At some point in this process—as I struggled with tape speeds that continued to modulate and drag—one of the rectifier diodes on the CMC board suddenly blew. Fortunately, nothing else was damaged, but when I replaced it, I preemptively replaced the other diode in the rectifier as well and found the tape speed stability substantially improved.
Though the voltages had tested fine on my oscilloscope after I completed the other electronic work weeks before, since then, the failing diode had apparently been affecting the CMC’s ability to regulate the motor speed for quite a while, without my realizing it.
All that was left were a couple more passes through the latter two steps of the keyboard adjustment process and tuning the overall pitch with the tuning coil on the CMC board. Because of how delicate all of the alignment adjustments are, I will be accompanying the Mellotron on its journey to the client's studio. Once there, I'll do one final adjustment to account for any shifting of the keyboard elements that might occur as it rides home in the client’s van.
Even a fully restored and perfectly-adjusted Mellotron will always have its sonic quirks. There are always going to be notes that sound a little different from each other—are louder, softer, brighter, or even fairly significantly out of tune. For some people, these inconsistencies add to the appeal of the instrument, but the finicky, expensive Mellotron is certainly not something that belongs in every studio.
If you like its distinctive sound but can’t afford the cost, space, or time required to own and maintain a real Mellotron, there are now great emulations available as software plugins, sample packs, and hardware instruments for a fraction of the cost.