Trying to put together your first recording rig or home studio can be overwhelming. With so many components and options, it can be tough to keep it all straight.
You may think that all you need to record at home is a microphone and a song in your heart, but you’d be sorely disappointed to take your sparkly new SM58 out of its box just to realize you don’t have a way to plug it into your computer.
Here’s what you’re going to need to start recording:
- A microphone
- A cable to connect the microphone
- A recording interface
- A computer with a Digital Audio Workstation (DAW)
- Monitors or headphones to listen to your performance
- Acoustic treatment when you realize your bedroom sounds like crap
Let’s start at the beginning.
There are literally thousands of microphones to choose from. They all have a slightly different sound, and some work better in certain situations than others, so I’m going to leave it up to you to find the right one for the job. There are plenty of excellent articles here on Reverb that can help you with just that task, but I would like to give one warning.
USB mics are great for quickly and simply recording vocals. They connect directly to your computer USB and don’t require an external recording interface. They're super convenient, and relatively inexpensive. So, what’s the downside?
Think of it this way: if you spend $500 on a mic and $500 on a recording interface, you spent a total of $1,000 on your signal chain.
If you spend $500 on a USB mic, you spent $500 on your signal chain.
Every link in your signal chain is just as important as the last. It doesn’t make sense to blow your whole budget on a really nice mic and skimp on the interface, or vice versa. The signal has to pass through every piece of gear, so they’re all equally important.
USB mics are great for podcasters, but if you’re looking for high–fidelity studio recordings, you’ll be better off purchasing a mic and recording interface separately.
Recording Interfaces
Now that you’ve got your microphone and XLR cable, we need to plug it into the computer, which is where the recording interface comes in.
There are a few things to consider when buying a recording interface:
- Inputs and Outputs
- Connection Type
- Quality and Budget
Inputs and Outputs
Most recording interfaces come with 2, 4, or 8 analog inputs. If you’re mostly going to be recording vocals, with the occasional instrumental overdub, you’re probably fine sticking with 2 inputs. But if you’re going to be mic’ing up a drum kit or tracking a band live, you’ll probably want to be looking at the 8–channel units.
Most modern recording interfaces interfaces are built to accept XLR and 1/4" inputs, as well as "hi–z" inputs where you can plug your electric guitar in directly.
Some “interfaces" are simply an RCA in and out, which won’t do you any good in the studio unless you’re trying to sample vinyl.
A word of caution: analog and digital inputs/outputs are not the same thing.
Some interfaces are described by their total number of analog and digital outputs, instead of just the available analog inputs a unit has.
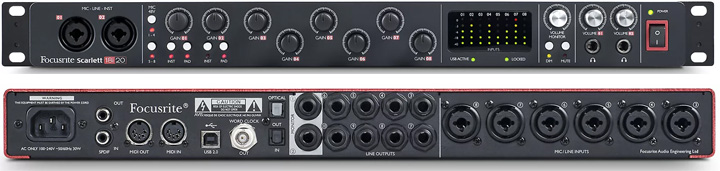
Scarlett 18i20
For instance, the Scarlett 18i20 from Focusrite is listed as an 18–input, 20–output device, which is technically true. But there are only 8 analog inputs, meaning you can only plug 8 microphones into it.
To utilize the digital inputs, you would need to purchase another unit with additional analog inputs and connect it to the Scarlett using an optical cable.
Connection Type
Connection type refers to how the recording interface will connect to your computer. Some will be specific to Windows or Mac operating systems, so make sure you check compatibility with your particular OS before purchasing.
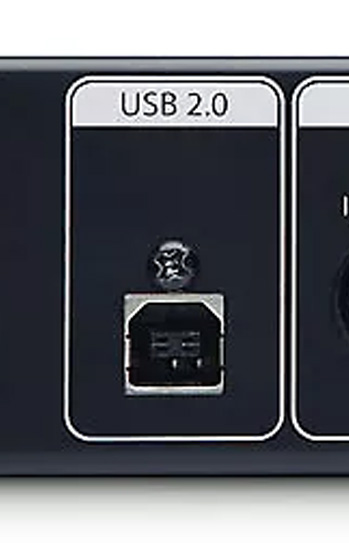
USB 2.0 on a PreSonus
AudioBox 44VSL
Here are the most common connection types:
USB: USB 2.0 is by far the slowest connection type of all your choices, but USB 3.0 is the fastest.
FireWire: This is mostly found on older Macs and Apple–compatible interfaces. Notably faster than USB 2.0, but still nowhere near as fast as Thunderbolt.
FireWire Thunderbolt: This is found exclusively on new Mac computers. It’s almost as fast as USB 3.0.
Most recording interfaces receive power through their connection to the computer, but some require an external power source, which can be bulky and cumbersome. Just do yourself a favor, and get an interface that doesn’t need external power.
Quality
The quality of the components used in the mic preamps and converters in a recording interface are directly tied to the price of the unit.
A microphone preamp is used to increase the volume of a microphone to a useable level, just like a guitar amp does for an electric guitar.
The Analog to Digital (AD) converters are responsible for converting the electrical signal from the microphone into a binary waveform that the computer can process, while the Digital to Analog (DA) converters are responsible for converting that waveform back into an electrical signal that the speakers recreate.
These components directly affect the quality of your digital recording, so you don’t want to skimp on them if possible.
Some interfaces are actually capable of recording at higher fidelity levels than others. The way we measure audio quality in a digital recording is broken down into two components: Sample Rate and Bit Depth.
Sample Rate is basically the frame rate of sound. Did you ever make a flip book when you were a kid? The more pages you have in the book, the more smooth and fluid the motion becomes as you flip through them. Same goes for audio.
The CD standard sample rate is 44,100Hz/sec, although many engineers choose to record at 48kHz/sec, meaning for every second of audio, there are essentially 48,000 “snapshots" being played.
Common sample rates include 44.1 kHz/sec, 48 kHz/sec, 88.2 kHz/sec, 96 kHz/sec, and 192 kHz/sec.
Higher sample rates produce higher fidelity recordings at the expense of file size. It should be noted that 44.1kHz/sec is the standard sample rate because most humans have a difficult time distinguishing anything better, so recording all of your tracks at 192 will make a negligible difference.
Bit Depth controls the dynamic range of a recording, which is the difference between the quietest and loudest sounds of a track. Digital recordings can be made using 16, 24, or even 32 bits. I like to think of the bit depth as the size of the canvas you’re working on.
A 16–bit recording has a theoretical dynamic range of 96dB, which means you’re working on a relatively small canvas. A 24-bit recording has a theoretical dynamic range of 144dB, which means you’ve got more room to work with.
The easiest way to see the difference in bit depth is through video games. Look at how blocky and “low quality" 8–bit Mario looks from the original NES game.

8-bit Mario

16-bit Mario
Now check out 16–bit Mario from his Super Nintendo days. Notice all of the details they were able to add? And how the edges all seem smoother and more rounded? Bit depth is basically the resolution of your audio recording.
Some of the less expensive recording interfaces are only capable of 44.1kHz/sec, 16–bit recordings, so be careful when searching for the cheapest option. With recording interfaces, you tend to get what you pay for.
Budget
If you’re wondering what the pros use, they tend to work with larger 16x16 AD/DA converters (like the ones from Avid or Apogee) and use recording consoles or 500 series preamps.
Now that you’re good and sticker–shocked, let’s take a look at this list of awesome interfaces for every budget.
After purchasing your interface, be sure to check the manufacturer’s website for the latest drivers and firmware to ensure the unit is working properly on your computer.
DAWs
If you try Googling “best DAW" you’ll find hours and hours of entertainment, but absolutely no answers. Well, here’s the secret: they’re basically all the same.
Basically every DAW on the market is designed to produce, record, edit, and mix audio. When you’re just getting into recording, there isn’t a huge amount of difference between them, and getting into the nitty gritty of how to choose the best for your workflow is a different story for a different day.
That said, some DAWs do shine in certain areas more than others.
Pro Tools is widely favored by professional studios simply because that’s the DAW that’s been used forever. It’s basically a digital tape machine. It’s great at recording, editing, and mixing audio, but doesn’t come with much in the way of digital instruments for music production.
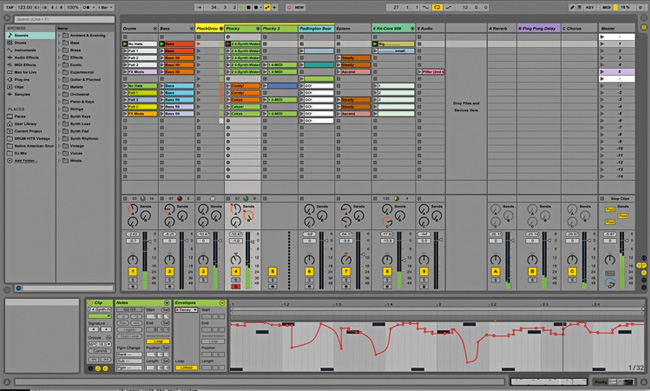
Ableton Live
Logic, on the other hand, is rife with creative tools to help you produce your next big hit. It also includes a vocal tuning plugin similar to Auto Tune, and a revolutionary drummer program that recreated the vibe and feel of a real drummer using MIDI.
Ableton Live has some unique features that make it excellent an excellent choice for live performances. It’s often used more as an instrument than a DAW—which makes it ideal for electronic music—but does the trick for recording, editing, and mixing too.
Aside from the big three above, there are dozens more to choose from, including some highly economical options, like Reaper.
Just remember that at the end of the day, all DAWs were created equal. Pick whichever one makes the most sense to you. There is no right or wrong, and a DAW does not have an effect on the sound quality of a recording (aside from selecting the sample rate and bit depth).
Editor's Note: Check out every installment in Brad Pack's series on home recording.
- Home Recording Basics I: Setting Up Your Studio with Monitors and Acoustic Treatment
- Home Recording Basics II: Choosing Your First Audio Interface and DAW
- Home Recording Basics III: A Guide to Microphone Types and Placement
- Home Recording Basics IV: How to Record Acoustic Guitar and Vocals
- Home Recording Basics V: Mic'ing a Drum Kit From Start to Finish
- Home Recording Basics VI: How to Mic Your Electric Guitar
- Home Recording Basics Part VII: Recording Vocals in Your Bedroom
- Home Recording Basics Part VIII: Basics of MIDI and MIDI Controllers
- Home Recording Basics Part IX: How to Prep Your Tracks for Mixing
- Home Recording Basics Part X: Equalization
- Home Recording Basics Part XI: Compression and Dynamics Processing
Learn more about how to record music at home on our Basics of Home Recording homepage.